50 Components Course: OneTimeAnimationPlayer + OneTimeSprite2D
Table of contents
Demo & Sources

You can try it yourself live here.
The source code is available on GitHub:
Design
What is the best way to design a component? It can be a bit tricky to understand it at first, but here's a checklist:
- rule #1: it only does ONE thing!
- rule #2: it is generic, so you can use it for any game.
- rule #3: it has as little dependencies as possible.
- rule #4: it can be used from the outside, by its owner.
Enforcing rule #1 makes sure you do not overscope your components.
Rule #2 makes sure you can reuse your components, in- and outside your current game project. Compare a Sprite2D node and an RPG talent tree and skill system. Sprite2D does one thing, displays an image. You can use that for any 2D game to display images. The RPG talent tree and skill system is not a component because it is highly specific to RPG games.
Rule #3 helps keeping your components flexible. Fewer dependencies mean that the component can be used in different contexts. Too many dependencies often suggest a too specific use-case.
Rule #4 establishes a standard communication line in your component-based games. There are 3 main ways of communication.
- A component can notify the outside world of an event happening with a signal (outside world is almost always the owner)
- The owner of the component can use the components functionality through its public method(s).
- The owner of the component can affect the behaviour of a component through changing its properties.
To make the process of designing a component easier, ask these three questions.
What is the ONE thing this component does?
OneTimeAnimationPlayer
It behaves exactly like a regular AnimatedSprite2D, except it auto-deletes itself after playing an animation.
OneTimeAnimatedSprite2D
It behaves exactly like a regular AnimatedSprite2D, except it auto-deletes itself after playing an animation.
What DATA the component needs to do its thing?
No extra data needed, treat it like a regular AnimationPlayer / AnimatedSprite2D node.
How does it communicate with the outside world?
These nodes are useful for one-time effects like explosions, particles for walking / jumping, etc. For this behaviour, no outside communication is needed.
If (for whatever reason) you need to be notified when the animation finishes, both AnimationPlayer and AnimatedSprite2D provide a signal called animation_finished out of the box.
Implementation
OneTimeAnimationPlayer
@icon("one_time_animation_player.svg")
class_name OneTimeAnimationPlayer
extends AnimationPlayer
First, a custom icon is provided which makes the component feel like it is part of the Godot eco system when you add it to the SceneTree.
Finally, a custom class_name is set and the class is extended from the AnimationPlayer class.
You can read more about the @icon annotation here.
@export var node_to_delete: Node = selfThen, an export variable is defined. It stores a reference the root Node which will be deleted, after the animation has finished playing. By default, it is the OneTimeAnimationPlayer itself.
func _ready() -> void:
	animation_finished.connect(
		node_to_delete.queue_free.unbind(1),
		CONNECT_ONE_SHOT
	)
Inside _ready(), the stored reference Node's queue_free() method is connected to the AnimationPlayer's animation_finished signal. Two things to note here:
- The
animation_finishedsignal has a string parameter, the name of the finished animation. Sincequeue_free()expects 0 arguments,unbind(1)is used to ignore the animation name. - For connecting the signal, the
CONNECT_ONE_SHOTflag is used to make sure thatqueue_free()is only called once.
OneTimeAnimatedSprite2D
@icon("one_time_animated_sprite_2d.svg")
class_name OneTimeAnimatedSprite2D
extends AnimatedSprite2D
First, a custom icon is provided which makes the component feel like it is part of the Godot eco system when you add it to the SceneTree.
Finally, a custom class_name is set and the class is extended from the AnimatedSprite2D class.
You can read more about the @icon annotation here.
@export var node_to_delete: Node = self
Then, an export variable is defined. It stores a reference the root Node which will be deleted, after the animation has finished playing. By default, it is the OneTimeAnimatedSprite2D itself.
func _ready() -> void:
	animation_finished.connect(
		node_to_delete.queue_free,
		CONNECT_ONE_SHOT
	)
Inside _ready(), the stored reference Node's queue_free() method is connected to the AnimatedSprite2D's animation_finished signal. Two things to note here:
- The AnimatedSprite2D's
animation_finishedsignal is different! It has no parameters, sounbind()is not needed here. - For connecting the signal, the
CONNECT_ONE_SHOTflag is used to make sure thatqueue_free()is only called once.
Example Use Case
The Scene setups are almost identical. Take a look at one of them:
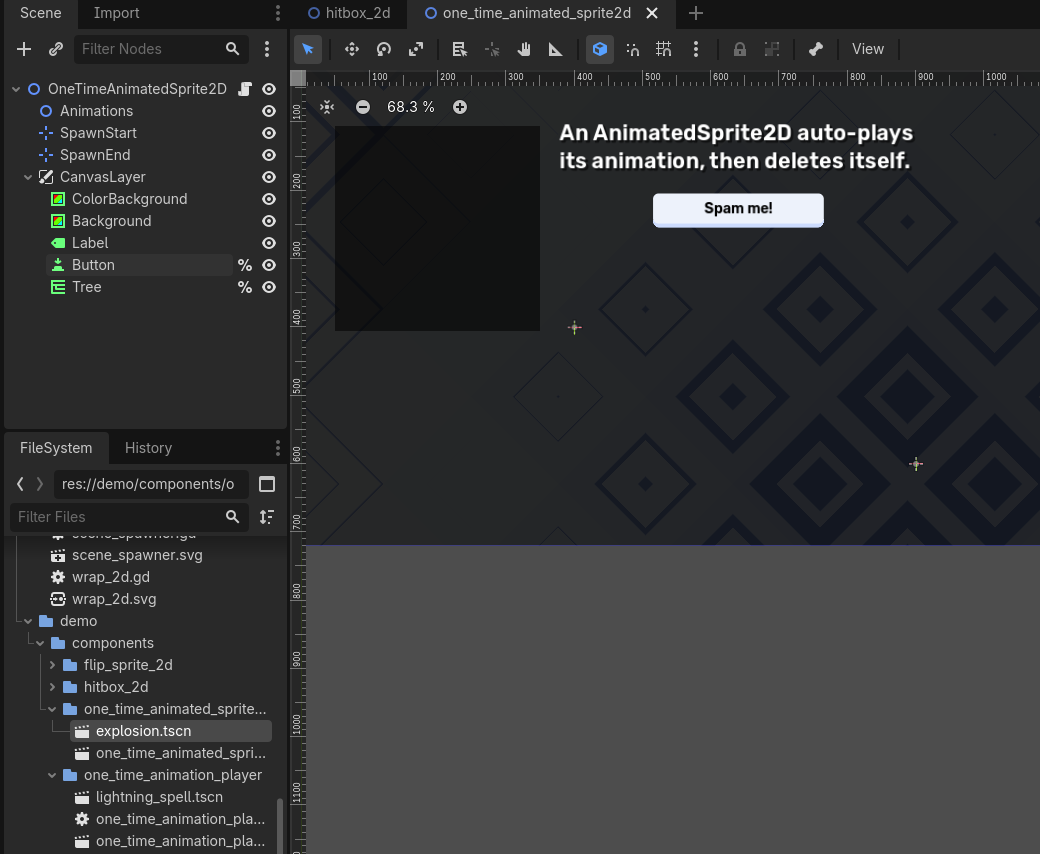
The Tree node is used to display the children of the Animations Node, where the OneTime node components will be spawned. This makes it easy to track the auto-deletion of the dynamically spawned nodes. Only the root node has a custom script attached:
extends Node2D

@export var animation: PackedScene
One variable is defined: this is used for spawning one of the two example animation-related scenes.
func _ready() -> void:
	%Tree.create_item().set_text(0, "Children of 'Animations' Node")
	%Button.pressed.connect(_on_button_pressed)
	$Animations.child_order_changed.connect(
		func():
			if not has_node("%Tree"):
				return

			%Tree.clear()
			var root: TreeItem = %Tree.create_item()
			root.set_text(0, "Children of 'Animations' Node")
			for child: Node in $Animations.get_children():
				var item: TreeItem = %Tree.create_item(root)
				item.set_text(0, child.name)
	)
Inside _ready(), we connect everything together:
- A root item is created for the Tree node.
- The button press is connected to a callback method for spawning one of the two example scenes.
- Finally, the Tree gets re-rendered when a child is added/deleted/moved for the Animation node. The Node.child_order_changed signal is used for this.
func _on_button_pressed() -> void:
	var new_anim: Node2D = animation.instantiate()
	$Animations.add_child(new_anim)
	var x := randi_range($SpawnStart.global_position.x, $SpawnEnd.global_position.x)
	var y := randi_range($SpawnStart.global_position.y, $SpawnEnd.global_position.y)
	new_anim.global_position = Vector2(x, y)
When the button is pressed we instantiate one of the two example scenes at random position inside the rectangle defined by the $SpawnStart and $SpawnEnd nodes.When the enemies are hit, they will:
The lightning spell is a separate scene, with the following setup:
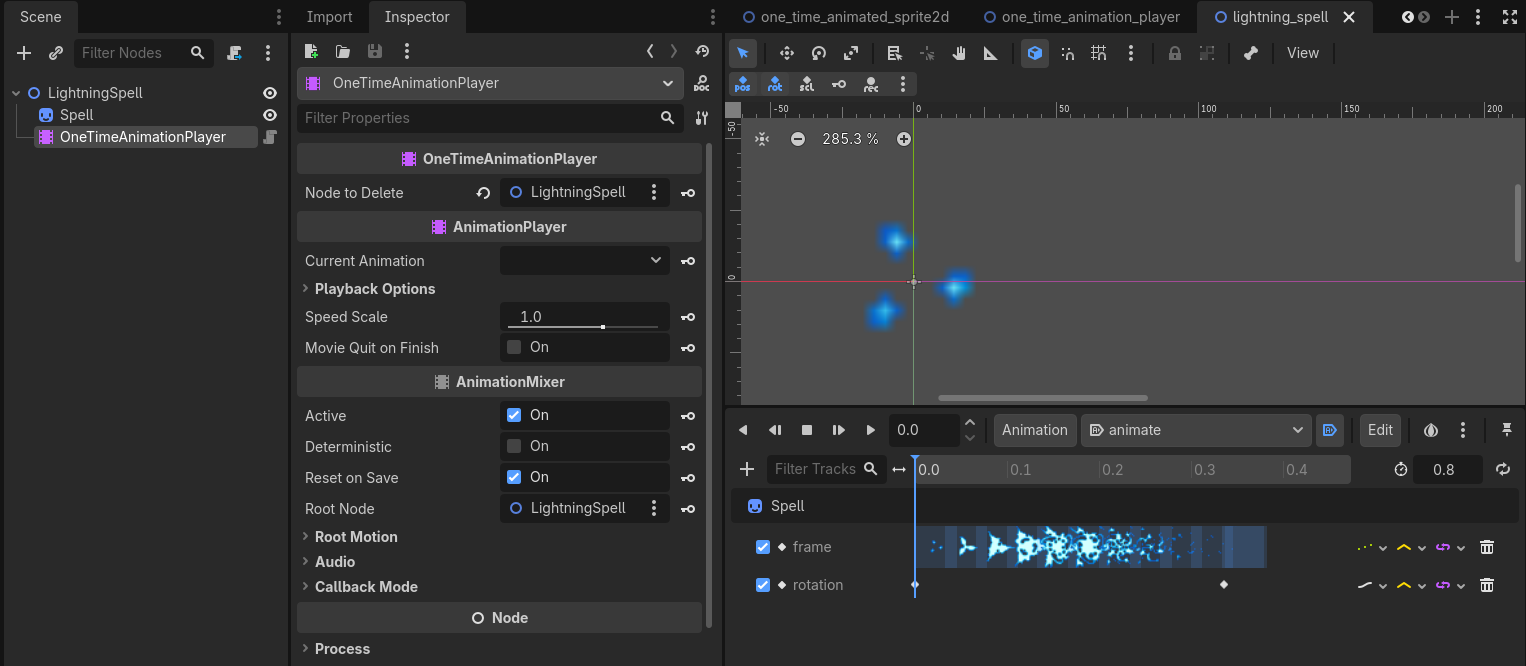
There is no need for an extra script. The AnimationPlayer handles the frame-by-frame animation and rotating the Sprite2D. An extra note:
➡️ Don't forget to set the animation to auto play to truly make it "set and forget"!
The explosion spell is a separate scene, with the following setup:
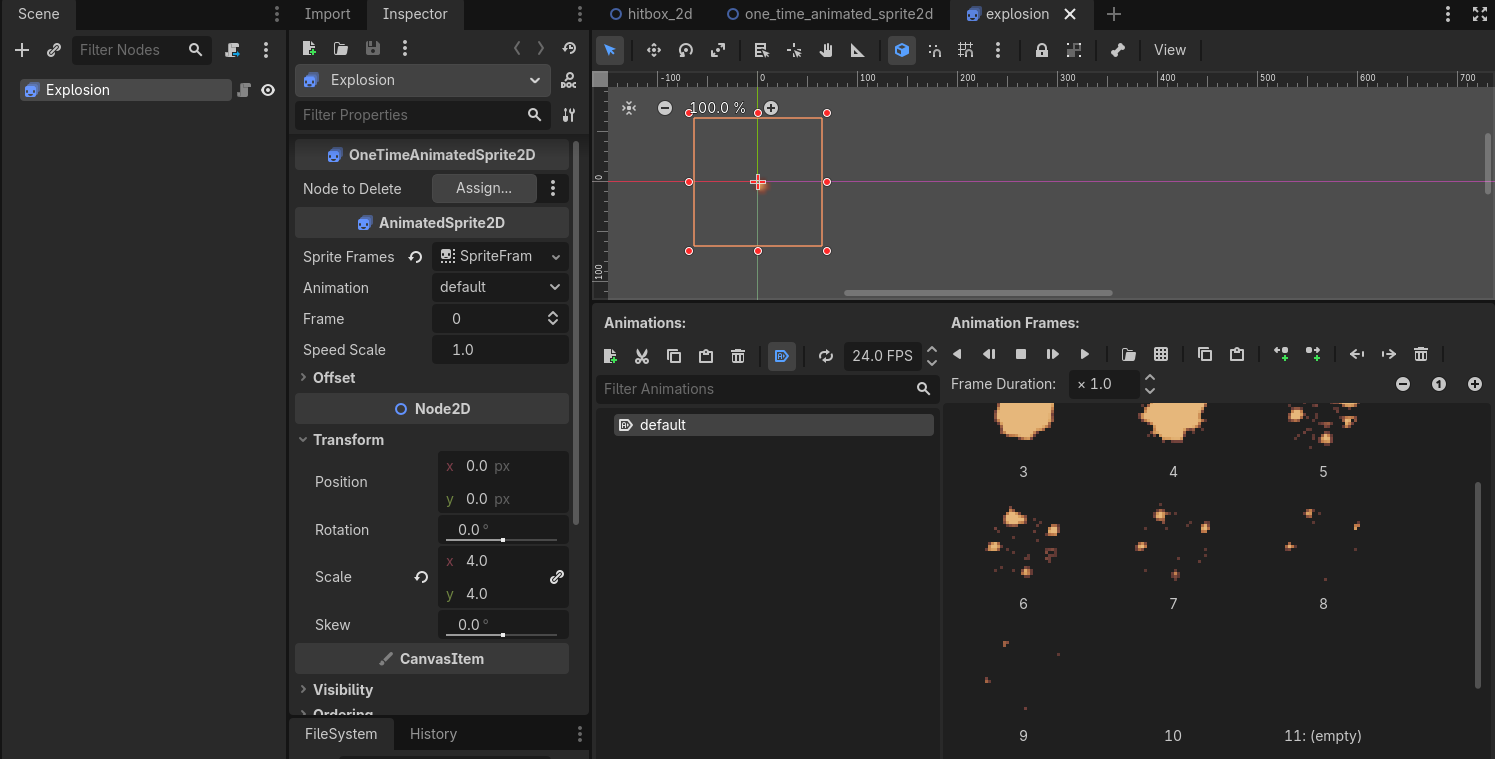
There is no need for an extra script or node here. The AnimatedSprite2D handles the frame-by-frame animation. A couple extra empty frames are added at the end so the Tree is easier to see in the testing Scene. Just to reiterate:
➡️ Don't forget to set the animation to auto play to truly make it "set and forget"!
Again, this is super useful for "set and forget" one-time effects like explosions and dust particles for walking, jumping, climbing etc.
That wraps up the OneTimeAnimationPlayer + OneTimeAnimatedSprite2D components!